You’re probably already familiar with dental floss—it’s the stringy stuff we all use to clean between our teeth. But have you ever heard of expanding dental floss? Expanding dental floss is just what it sounds like: a type of floss that expands when you put it in your mouth. This means it can reach more areas between your teeth than traditional floss, which can sometimes be difficult to maneuver around molars and other large teeth.
Expanding dental floss is also great for people who have a hard time reaching back teeth or those who have trouble getting the traditional floss between their teeth. Because the expanding part of the floss is soft, it will conform to any surface without causing damage or irritation.
Read on to learn more about How To Use Expanding Dental Floss, How To Floss With Braces Platypus and

How To Use Expanding Dental Floss
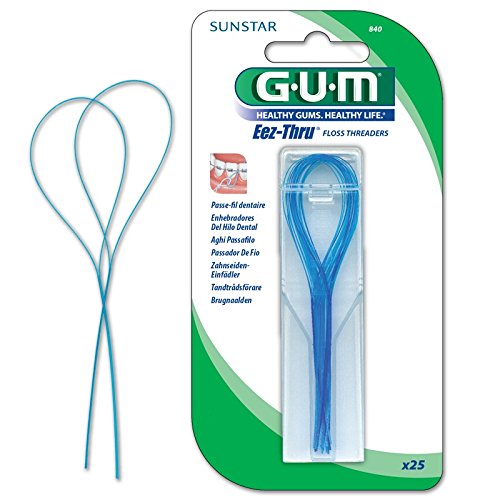
GUM Expanding dental floss (43.3 Yd), removes plaque from hard-to-reach areas between teeth which have larger gaps, while also cleaning effectively in more regular spaces between the teeth.
Lightly lubricated with wax for easy handling and insertion between the teeth. Expands during use to clean the tooth surfaces adjacent to the wider gaps more effectively.
Floss has a texturized nylon construction that is more gentle on the gums.
Description
GUM Expanding dental floss is designed and manufactured that can assist you cast off plaque from the hard-to-reach areas between teeth which have larger gaps, even as also cleaning effectively in more regular spaces between the teeth. In use, the floss expands forming a larger diameter string that contacts more surface area around the gaps. Large gaps frequently occur because of gum recession and papilla loss, both consequences of periodontitis. GUM Expanding dental floss is lightly lubricated with wax for simple handling and insertion between the teeth, and expands all the way through use to clean the tooth surfaces adjacent to the wider gaps more effectively. The floss has a texturized nylon construction that may be more gentle on the gums because of its wider diameter than regular fine floss. This can be a specialized product to help in making between-teeth cleaning easier and more effective for people with irregular or large gaps between their teeth or those who find fine floss too narrow.
GUM Expanding dental floss (43.3 Yd), removes plaque from hard-to-reach areas between teeth which have larger gaps, even as also cleaning effectively in more regular spaces between the teeth.
Lightly lubricated with wax for simple handling and insertion between the teeth. Expands all the way through use to clean the tooth surfaces adjacent to the wider gaps more effectively.
How To Floss With Braces Platypus
How to Floss With Braces
by Dr. Tyler Coles – Premier Orthodontics
Ask anyone what the hardest part about braces is, and they’ll usually give you the same answer: flossing.
One study shows that only 30% of Americans floss their teeth when they don’t have braces…
…so you can bet that it’s even less when someone has another obstacle, like braces on their teeth to get around.
Why is Flossing With Braces So Important?
According to the American Dental Association, “Cleaning between teeth removes plaque that can lead to cavities or gum disease from the areas where a toothbrush can’t reach.”
In other words, flossing removes plaque and helps prevent cavities and gum disease.
If someone has braces, the risk for plaque buildup, cavities, and gum disease increases dramatically. If you invested in braces to make your teeth straight then shouldn’t you want them to remain clean and healthy in the process?
That’s why we want to show you the easiest, most effective ways to floss your teeth with braces.
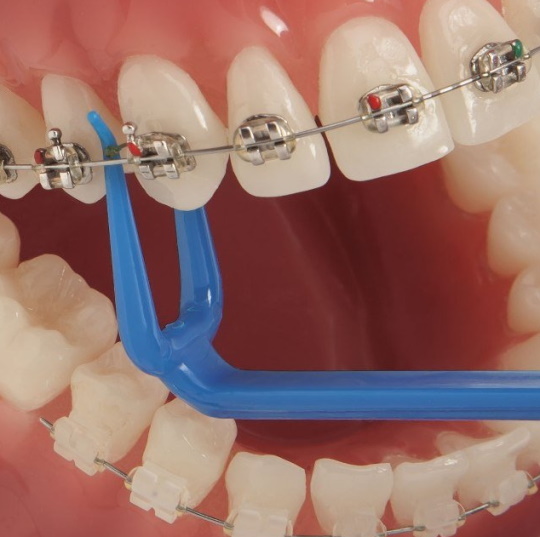
How to Floss With Braces Using a Floss Threader
Before you pick up some regular floss, you need to know that it doesn’t work quite the same way if you have braces…
An extra tool is required in order to get the floss beneath the archwire. This tool is called a floss threader.
The best way to picture a floss threader is to first imagine a needle and thread. The floss threader will act as the needle, and your floss will be the thread.
First, pass a piece of floss through the floss threader…
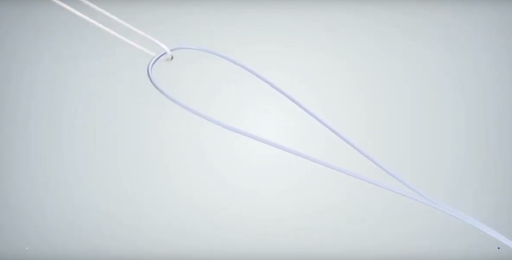
…and then using the floss threader, “thread” the floss beneath the wire.
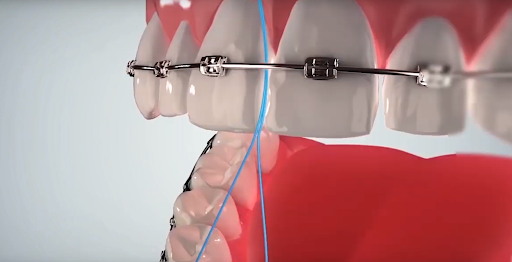

Once you have the floss beneath the wire, you can floss as you normally would.
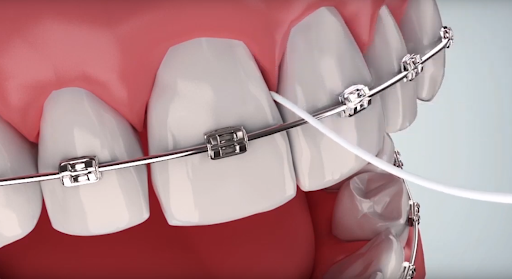
After you have flossed one tooth you will need to repeat this process for each tooth.
The Pros of Using a Floss Threader to Floss With Braces:
- Very Inexpensive – Your orthodontist will likely give you a pack for free (or you can pick some up for a few dollars on Amazon or at a drug store)
- Reusable – One pack will likely last you months or years
- A Process You’re Already Used To – No special tools are needed, just the threader and floss.
The Cons of using a Floss Threader to Floss With Braces
- Tricky To Use At First – This is especially true for younger kids. Using the floss threader requires some hand skills that may prove difficult for young children.
- Takes Longer Than Normal Flossing – . Because you have to repeat the process of flossing beneath the wire for every tooth in your mouth, this can be a time consuming process.
Check out our video about brushing and flossing with braces! It demonstrates exactly how floss threaders are used.
Overall, using a floss threader to floss with braces works well and many patients choose this option for its cost-effectiveness. But if you’d like to find a faster or easier option, keep reading below…
How to Floss With Braces Using Superfloss
Superfloss is essentially a piece of floss with one stiff end.
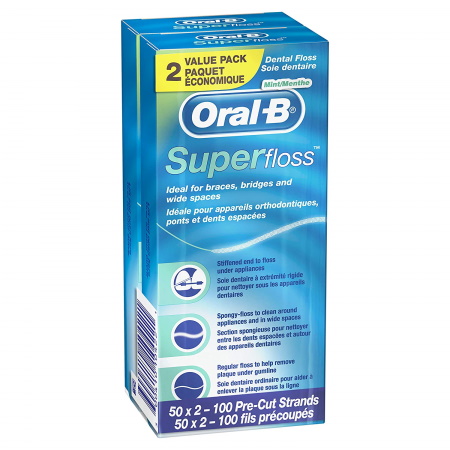
Superfloss works similarly to a floss threader, only you don’t need to do the “needle and thread” process. You simply take the stiff end of floss, guide it beneath your archwire, and floss your teeth.
The Pros of Using a Superfloss to Floss With Braces:
- Easier Than a Floss Threader – Most kids and adults figure this method out pretty easily.
- Easy To Find – It can be purchased on Amazon or at your local drug store
The Cons of using a Superfloss to Floss With Braces
- Also Time Consuming – Because you have to repeat the process of guiding the floss beneath the wire, it does take a little bit of time.
- Not Reusable – Super floss is a one-time use product, so each day you will use a new piece and throw it away. This product isn’t too expensive, but while you are in braces you will likely need several boxes to get you by.
Superfloss is a great tool that cleans well. Grab a pack next time you’re at the drug store and try it out for yourself!
How to Floss With Braces Using a Platypus Orthodontic Flosser
Platypus Orthodontic Flossers are one of the quickest, and EASIEST ways to floss with braces.
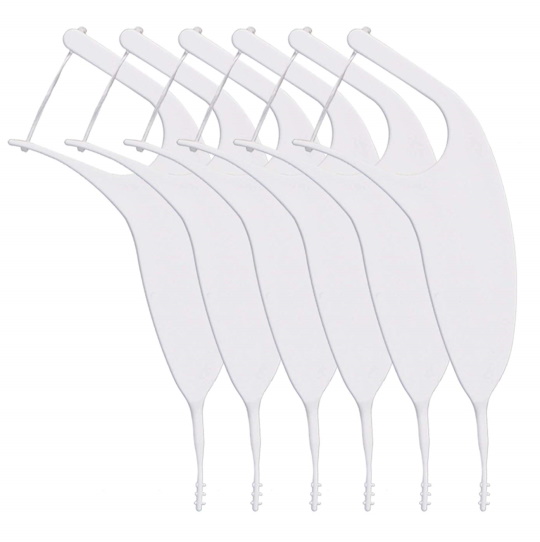
There is no threading required with the platypus orthodontic flossers. The narrow side of the flosser is designed to fit behind the arch wire, allowing you to floss your entire mouth in no more than two minutes (usually less)!
The easiest way to understand how the Platypus Orthodontic Flosser works is to see it in action. Click below to watch a video about how to floss with braces using the Platypus Orthodontic Flosser.
The Pros of Using a Platypus Orthodontic Flosser to Floss With Braces:
- Fastest Method – You can floss your entire mouth in two minutes or less.
- No Threading Required – This makes it easier for young kids who may struggle with the floss threaders on their own.
The Cons of Using a Platypus Orthodontic Flosser to Floss With Braces
- Cost More Than Floss Threaders – The Platypus Orthodontic flossers are a one-time use product, so each day you will use a new flosser and throw it away. This product is still reasonably priced, however, and you can buy them in larger packages to save money.
- Difficult To Find In-Store – This is most likely a solution you will need to order online. You can find them on Amazon with free shipping and in multiple package sizes.
How to Floss With Braces Using a Harp Orthodontic Flosser
The Harp Orthodontic Flosser is very similar to the platypus flosser – it too allows you to floss without threading. You simply guide the small end of the flosser beneath the archwire to floss your entire mouth; no threading required!
Watch the video below to learn more about the harp flosser and to see it in action.
The Pros of Using a Harp Orthodontic Flosser to Floss With Braces:
- Quick And Easy – You can floss your entire mouth in two minutes or less.
- No Threading Required – This makes it easier for young kids who may struggle with the floss threaders on their own.
- Reusable For Up To A Week – , This means less total flossers you will have to buy throughout the time you have braces.
The Cons of Using a Harp Orthodontic Flosser to Floss With Braces
- Cost More Than Floss Threaders – Harp Flossers cost more than floss threaders, but they are still very reasonable. To get a month’s supply of Harp flossers it comes out to about $5!
- Difficult To Find – They can’t be found at local drug stores or on Amazon, but you can order them direct on the Harp company website.
How to Floss With Braces Using a Waterpik or Water Flosser
A Waterpik is a popular brand of water flosser. A water flosser is a device that delivers a stream of pressurized pulsating water between your teeth, along the gum line, and around your braces. If you find that string floss, no matter the type, is too difficult to do on a daily basis, then a water flosser might be a good choice for you!
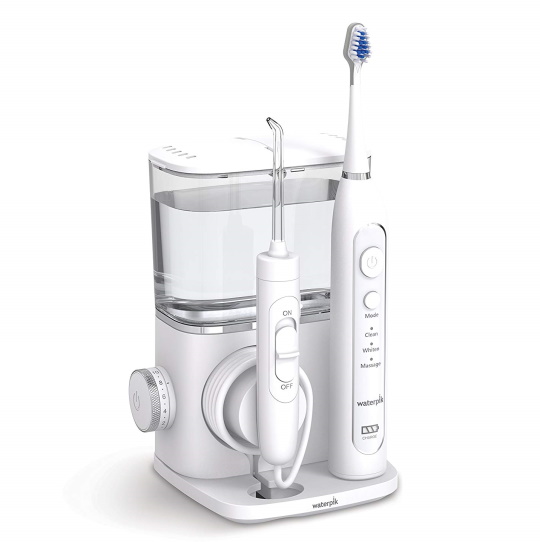
In addition to cleaning between your teeth like floss, a water flosser can also help remove food debris along the gum and around the braces. Watch the video below to see how a water flosser can help you floss with braces and keep your braces clean.
The Pros of Using a Waterpik or Water Flosser to Floss With Braces:
- No String Required – If you or your child struggles with string floss, a water flosser is likely the best answer. It’s quick, easy and lets you floss your entire mouth in two minutes or less.
- Helps Around The Braces And Gum Line – String floss just can’t get to these areas.
- Easy To Find – You can pick Waterpiks or water flossers up at your local drug store or online.
- One-Time Investment – One unit will last the entire time you’re in braces—plus a long time after that! This is also the most eco-friendly choice, as it allow you to entirely eliminate trash waste from your flossing routine.
The Cons of Using a Waterpik or Water Flosser to Floss With Braces
- Most Expensive – Portable units start around $30, and counter top units may cost up to $70. But remember, you never have to replace it while you’re wearing braces.
- Not Portable – A water flosser does require you to be near a sink in order to use it.
No matter which type of floss you choose . . . there’s no doubt that flossing with braces is crucial to maintaining healthy teeth, healthy gums, and avoiding bad breath with braces.
With the tools listed above, you’ll find it easier and less time consuming than ever to floss with braces.
Flossing with braces hurts

It’s important to keep your braces and teeth properly clean. Otherwise, you may end up with gum disease and decalcification of your teeth! Cleaning teeth in braces isn’t hard; it just takes time and patience. When you first get your braces on, brushing and flossing will probably take 10 to 20 minutes. As you get used to your braces and time passes, you’ll get faster at it.
The first few days after you get your braces, your teeth and gums may be very sensitive. It may be extremely difficult to brush and floss properly because of this sensitivity. Just do your best. You may need to take a break from flossing for a few days until the initial pain and sensitivity subside.
How often should you brush your teeth? Ideally, after every meal and snack. Of course, that may not be realistic. Just brush as often as you can. In between, swish water in your mouth or just rinse and spit a few times. Make sure that you floss at least once a day.
Steps For Keeping Your Braces Clean
You can find many of the products mentioned in your local drugstore or here at DentaKit.com:
- Rinse your mouth with water to help dislodge any food particles that may be stuck in your braces. Give it a few really good rinses.
- Use a dental pick or a spiral inter-proximal brush to dislodge any large visible food particles, and rinse again. Just poke the little brush or dental pick under the arch wire between each bracket. There are a number of dental picks and small spiral brushes available, in different sizes and types. Our favorite dental pick is the Pick-a-Dent, and our favorite inter-promial brushes are the Proxi-Tip, the SulcaBrush, and the Tip-a-Dent. After you dislodge the food particles, rinse with water once or twice. Now you’re ready to brush.
- Put a small amount of toothpaste on your toothbrush. It’s better to use a regular “non-whitening” toothpaste; otherwise your exposed teeth could end up whiter than the teeth beneath your brackets! An orthodontic v-trim toothbrush isn’t absolutely necessary, but it does help. Brush the brackets on each tooth both up and down and side to side. Angle the toothbrush so that you get underneath the brackets to ensure that all surfaces are clean. Sometimes brushing in a circular motion over each tooth is helpful. If you have an electric toothbrush, follow the manufacturer’s instructions for cleaning your braces. Don’t forget to brush your molars and your tongue, too!
- Floss at least once a day. The floss must go underneath the arch wire of each tooth. You need to poke the floss underneath the arch wire, floss the tooth, then remove the floss, and repeat the process on the next tooth. This can get tricky, especially for the back molars. Fortunately, there are several products which can help you. You can use any floss you like with a Floss Threader Needle or the FlossFish tool. Several brands of floss have a built-in stiff end, such as Oral-b Crest Glide Threader Floss. INo matter what type of floss you use, just go slowly and be patient with yourself. Flossing braces is one of the most frustrating parts of the entire process, especially at first. As time passes you’ll get better and faster at flossing.
- Consider an Oral Irrigator, especially if you can’t floss well. Oral irrigators don’t take the place of flossing, but you can add irrigation to your routine to ensure that your teeth and gums stay super healthy. We sell a great oral irrigator made by Oral Breeze which hooks up to your bathroom faucet.
When you have braces, consider getting your teeth professionally cleaned by your dentist more often. When I had my braces, I got four cleanings per year instead of the usual two cleanings. Cleaning your teeth more often will ensure that you don’t get any “bad surprises” whe