Eyelid lift strips are a great way to get instant results when it comes to looking younger and more rested. These strips can be used for both upper or lower lids, depending on your preferred look. The process is simple: apply the strip to your eyelid and hold it in place for several minutes. When you’re ready, pull the tab and watch as your skin lifts away from the eye!
Here at [company name], we believe that no woman should have to settle for tired-looking eyes. That’s why we’ve created our [product name] line of eyelid lift strips, which not only gives you an instant lift, but also helps support collagen production in the area around the eyes.
Read on to learn more about How To Use Eyelid Lift Strips, How to Floss With Braces Using a Floss Threader & How to Floss With Braces Using a Harp Orthodontic Flosser

How To Use Eyelid Lift Strips
You’ve likely heard of eyelid tape, the niche beauty hack that helps lift the area via eyelid stickers, fibers, or adhesives. They aren’t commonly found at most beauty retailers, but now there’s a new brand bringing them mainstream. Enter Magicstripes Eyelid Lifting Strips, curved silicone stickers that work like an instant lid lift by hoisting extra skin for a firmer, more wide-awake look.
Also, enter me, who got super excited when I first saw these things. (They’ve been available in Europe for a while, but now they’re available stateside at Barneys .) For the record, I have hooded lids, which means a little fold of skin sometimes covers the crease of my eyelids — think Gisele Bündchen, Jennifer Lawrence, Blake Lively (three women I look nothing like except for this eyelid thing). In my opinion, having hooded lids can really suck the joy out of eye makeup. I’ve been drawing on cat eyes since I was 13, and as every year passes I’ve noticed less and less space available for my liquid liner. Plus, my wings have gotten a little thicker and more…aggressive since subtle liquid liner flicks can look uneven or poke out oddly from above a wrinkle. Basically, these eyelids are annoying. But surgery is expensive, so let’s try these stickers first.
Unlike many other eyelid tapes I’ve seen, these stickers aren’t double-sided — the adhesive is only on one side. As a newbie, this made them infinitely easier to apply since my fingers didn’t ruin the adhesive by getting stuck to it. The key is to gingerly peel the sticker off the backing at one edge. Use tweezers if you’re all thumbs, just don’t mash them with your fingertips.
Full disclosure: I lost my first few pairs to trial and error when it took a couple of attempts to find the perfect spot to place them. Place them just above the crease, following the curve of the eye socket . You’ll likely need to stick and restick them the first few times to determine the exact placement that gives you the lift you want. Luckily, the trial pack, which is designed to help you determine the right size sticker for your eye shape, contains 32 small strips, 32 medium strips, and 32 large strips, so I had a little room to experiment.
WATCHAllure’s Ultimate Beauty Tips: 32 Tips in Under 4 Minutes
ADVERTISEMENT
I tried the small- and medium-size stickers and saw a modicum of improvement, but my husband had no idea what I was getting at when I hovered uncomfortably close to him asking if anything looked different. The teensy-weensy amount of lift wasn’t enough of a payoff for the application process and I was bummed. Then I headed back to the bathroom, tried on the large ones and screamed, “Look! I have eyelids!”
There’s a clear difference of a few millimeters, which was enough to make Joshua Zeichner, director of cosmetic and clinical research in dermatology at Mount Sinai Hospital in New York City, say, “Holy sh*t!” when I emailed him before-and-after photos. It’s also enough space to bring back the possibility of eye shadow. The stickers themselves are pretty makeup-friendly — you can apply shadow over them, which actually makes them easier to hide. (Tip: Powder shadows work better than creams. Also, dab, don’t blend.) Which leads me to my next point: Although they’re transparent, they’re not entirely invisible. You can sort of see them when you blink or flutter your lids, but it’s not a deal breaker. I had to point them out before my husband or mom noticed. They’re super lightweight and don’t feel like anything, which is great because I forgot I was wearing them until it was time to remove them at night.
Most Popular
- WELLNESSEach Zodiac Sign’s Unique Personality TraitsBY ALIZA KELLY
- WELLNESSNatalie Portman on Bulking up for Thor: ‘I Was Asked to Get as Big as Possible’BY ELIZABETH LOGAN
- MAKEUPPeople on TikTok Are Using Maybelline Tattoo Brow as Semi-Permanent Lip Liner and LipstickBY CHELSEA AVILA
Taking them off is a no-brainer — grip the sticker by an edge with tweezers or fingertips and carefully peel them away from the skin. You’ll notice that your eyelid skin stretches a little bit when you pull the sticker off, the way it does when you remove false lashes. This can freak you out if you’re already worried about sagging skin, which is presumably why you’re wearing these in the first place.
I asked Zeichner, who says it’s unlikely that using them will make lids even droopier (phew!), though the usual rules of messing around with the delicate skin around the eyes still applies. “Any significant chronic tugging of the skin, be it aggressive rubbing with eye makeup remover, removing fake eyelashes or even these strips, can lead to skin inflammation and premature aging,” he says. So be gentle.
Would I wear them again? Definitely! Especially if I felt like playing up my eyes with a cool shadow look for an event, or if I wanted to look more awake for a photo shoot. Would I wear them every day? Nah. Turns out my heavy lids don’t bother me enough to add one more step to my lazy beauty routine. I’m better off spending that time covering my dark circles.
How to floss with braces platypus
How to Floss With Braces
by Dr. Tyler Coles – Premier Orthodontics
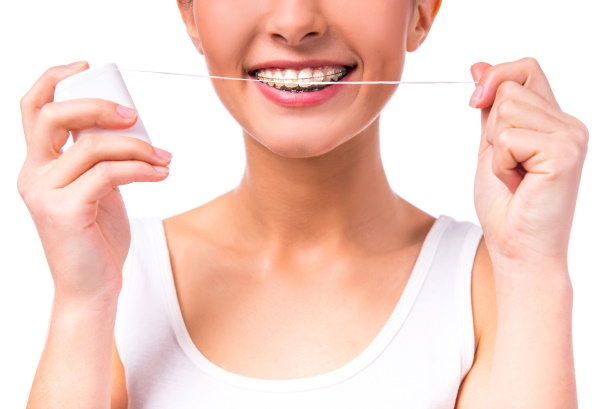
Ask anyone what the hardest part about braces is, and they’ll usually give you the same answer: flossing.
One study shows that only 30% of Americans floss their teeth when they don’t have braces…
…so you can bet that it’s even less when someone has another obstacle, like braces on their teeth to get around.
Why is Flossing With Braces So Important?
According to the American Dental Association, “Cleaning between teeth removes plaque that can lead to cavities or gum disease from the areas where a toothbrush can’t reach.”
In other words, flossing removes plaque and helps prevent cavities and gum disease.
If someone has braces, the risk for plaque buildup, cavities, and gum disease increases dramatically. If you invested in braces to make your teeth straight then shouldn’t you want them to remain clean and healthy in the process?
That’s why we want to show you the easiest, most effective ways to floss your teeth with braces.
How to Floss With Braces Using a Floss Threader
Before you pick up some regular floss, you need to know that it doesn’t work quite the same way if you have braces…
An extra tool is required in order to get the floss beneath the archwire. This tool is called a floss threader.
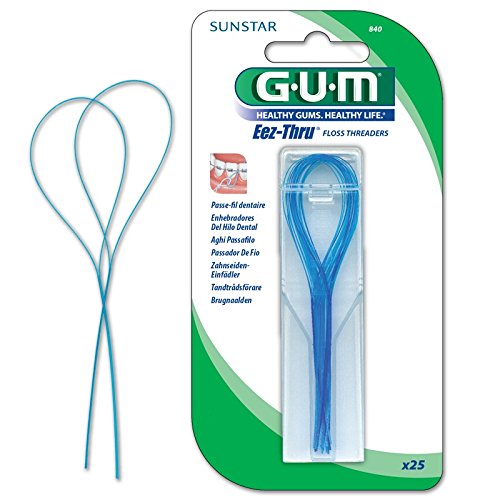
The best way to picture a floss threader is to first imagine a needle and thread. The floss threader will act as the needle, and your floss will be the thread.
First, pass a piece of floss through the floss threader…
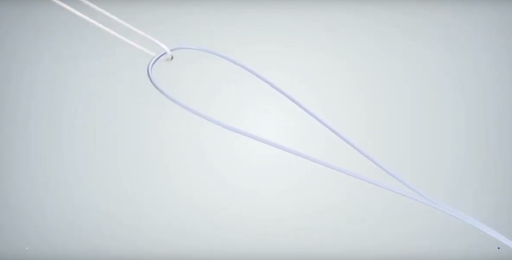
…and then using the floss threader, “thread” the floss beneath the wire.
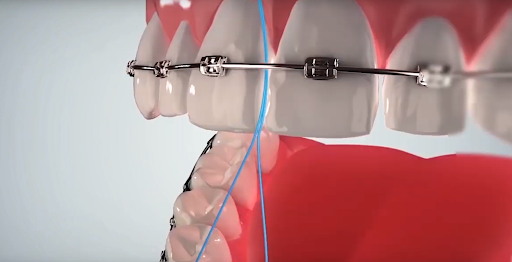

Once you have the floss beneath the wire, you can floss as you normally would.
After you have flossed one tooth you will need to repeat this process for each tooth.
The Pros of Using a Floss Threader to Floss With Braces:
- Very Inexpensive – Your orthodontist will likely give you a pack for free (or you can pick some up for a few dollars on Amazon or at a drug store)
- Reusable – One pack will likely last you months or years
- A Process You’re Already Used To – No special tools are needed, just the threader and floss.
The Cons of using a Floss Threader to Floss With Braces
- Tricky To Use At First – This is especially true for younger kids. Using the floss threader requires some hand skills that may prove difficult for young children.
- Takes Longer Than Normal Flossing – . Because you have to repeat the process of flossing beneath the wire for every tooth in your mouth, this can be a time consuming process.
Check out our video about brushing and flossing with braces! It demonstrates exactly how floss threaders are used.
Overall, using a floss threader to floss with braces works well and many patients choose this option for its cost-effectiveness. But if you’d like to find a faster or easier option, keep reading below…
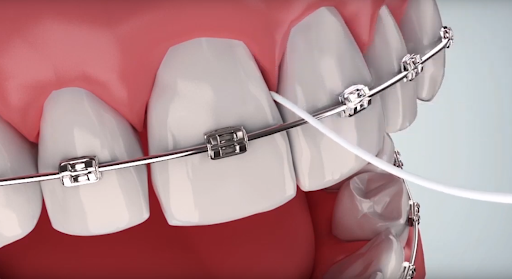
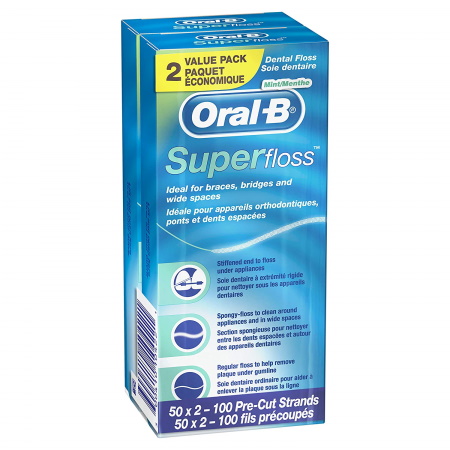
How to Floss With Braces Using Superfloss
Superfloss is essentially a piece of floss with one stiff end.
Superfloss works similarly to a floss threader, only you don’t need to do the “needle and thread” process. You simply take the stiff end of floss, guide it beneath your archwire, and floss your teeth.
The Pros of Using a Superfloss to Floss With Braces:
- Easier Than a Floss Threader – Most kids and adults figure this method out pretty easily.
- Easy To Find – It can be purchased on Amazon or at your local drug store
The Cons of using a Superfloss to Floss With Braces
- Also Time Consuming – Because you have to repeat the process of guiding the floss beneath the wire, it does take a little bit of time.
- Not Reusable – Super floss is a one-time use product, so each day you will use a new piece and throw it away. This product isn’t too expensive, but while you are in braces you will likely need several boxes to get you by.
Superfloss is a great tool that cleans well. Grab a pack next time you’re at the drug store and try it out for yourself!
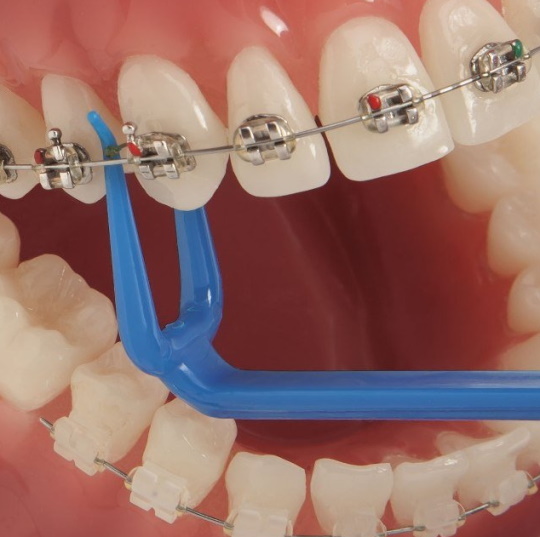
How to Floss With Braces Using a Platypus Orthodontic Flosser
Platypus Orthodontic Flossers are one of the quickest, and EASIEST ways to floss with braces.
There is no threading required with the platypus orthodontic flossers. The narrow side of the flosser is designed to fit behind the arch wire, allowing you to floss your entire mouth in no more than two minutes (usually less)!
The easiest way to understand how the Platypus Orthodontic Flosser works is to see it in action. Click below to watch a video about how to floss with braces using the Platypus Orthodontic Flosser.
The Pros of Using a Platypus Orthodontic Flosser to Floss With Braces:
- Fastest Method – You can floss your entire mouth in two minutes or less.
- No Threading Required – This makes it easier for young kids who may struggle with the floss threaders on their own.
The Cons of Using a Platypus Orthodontic Flosser to Floss With Braces
- Cost More Than Floss Threaders – The Platypus Orthodontic flossers are a one-time use product, so each day you will use a new flosser and throw it away. This product is still reasonably priced, however, and you can buy them in larger packages to save money.
- Difficult To Find In-Store – This is most likely a solution you will need to order online. You can find them on Amazon with free shipping and in multiple package sizes.
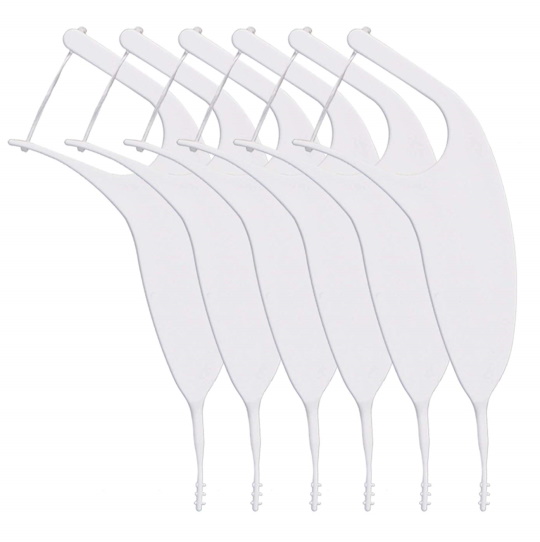
How to Floss With Braces Using a Harp Orthodontic Flosser
The Harp Orthodontic Flosser is very similar to the platypus flosser – it too allows you to floss without threading. You simply guide the small end of the flosser beneath the archwire to floss your entire mouth; no threading required!
Watch the video below to learn more about the harp flosser and to see it in action.
The Pros of Using a Harp Orthodontic Flosser to Floss With Braces:
- Quick And Easy – You can floss your entire mouth in two minutes or less.
- No Threading Required – This makes it easier for young kids who may struggle with the floss threaders on their own.
- Reusable For Up To A Week – , This means less total flossers you will have to buy throughout the time you have braces.
The Cons of Using a Harp Orthodontic Flosser to Floss With Braces
- Cost More Than Floss Threaders – Harp Flossers cost more than floss threaders, but they are still very reasonable. To get a month’s supply of Harp flossers it comes out to about $5!
- Difficult To Find – They can’t be found at local drug stores or on Amazon, but you can order them direct on the Harp company website.
How to Floss With Braces Using a Waterpik or Water Flosser
A Waterpik is a popular brand of water flosser. A water flosser is a device that delivers a stream of pressurized pulsating water between your teeth, along the gum line, and around your braces. If you find that string floss, no matter the type, is too difficult to do on a daily basis, then a water flosser might be a good choice for you!
In addition to cleaning between your teeth like floss, a water flosser can also help remove food debris along the gum and around the braces. Watch the video below to see how a water flosser can help you floss with braces and keep your braces clean.
The Pros of Using a Waterpik or Water Flosser to Floss With Braces:
- No String Required – If you or your child struggles with string floss, a water flosser is likely the best answer. It’s quick, easy and lets you floss your entire mouth in two minutes or less.
- Helps Around The Braces And Gum Line – String floss just can’t get to these areas.
- Easy To Find – You can pick Waterpiks or water flossers up at your local drug store or online.
- One-Time Investment – One unit will last the entire time you’re in braces—plus a long time after that! This is also the most eco-friendly choice, as it allow you to entirely eliminate trash waste from your flossing routine.
The Cons of Using a Waterpik or Water Flosser to Floss With Braces
- Most Expensive – Portable units start around $30, and counter top units may cost up to $70. But remember, you never have to replace it while you’re wearing braces.
- Not Portable – A water flosser does require you to be near a sink in order to use it.
No matter which type of floss you choose . . . there’s no doubt that flossing with braces is crucial to maintaining healthy teeth, healthy gums, and avoiding bad breath with braces.
With the tools listed above, you’ll find it easier and less time consuming than ever to floss with braces.
Flossing with braces hurts

It’s important to keep your braces and teeth properly clean. Otherwise, you may end up with gum disease and decalcification of your teeth! Cleaning teeth in braces isn’t hard; it just takes time and patience. When you first get your braces on, brushing and flossing will probably take 10 to 20 minutes. As you get used to your braces and time passes, you’ll get faster at it.
The first few days after you get your braces, your teeth and gums may be very sensitive. It may be extremely difficult to brush and floss properly because of this sensitivity. Just do your best. You may need to take a break from flossing for a few days until the initial pain and sensitivity subside.
How often should you brush your teeth? Ideally, after every meal and snack. Of course, that may not be realistic. Just brush as often as you can. In between, swish water in your mouth or just rinse and spit a few times. Make sure that you floss at least once a day.
Steps For Keeping Your Braces Clean
You can find many of the products mentioned in your local drugstore or here at DentaKit.com:
- Rinse your mouth with water to help dislodge any food particles that may be stuck in your braces. Give it a few really good rinses.
- Use a dental pick or a spiral inter-proximal brush to dislodge any large visible food particles, and rinse again. Just poke the little brush or dental pick under the arch wire between each bracket. There are a number of dental picks and small spiral brushes available, in different sizes and types. Our favorite dental pick is the Pick-a-Dent, and our favorite inter-promial brushes are the Proxi-Tip, the SulcaBrush, and the Tip-a-Dent. After you dislodge the food particles, rinse with water once or twice. Now you’re ready to brush.
- Put a small amount of toothpaste on your toothbrush. It’s better to use a regular “non-whitening” toothpaste; otherwise your exposed teeth could end up whiter than the teeth beneath your brackets! An orthodontic v-trim toothbrush isn’t absolutely necessary, but it does help. Brush the brackets on each tooth both up and down and side to side. Angle the toothbrush so that you get underneath the brackets to ensure that all surfaces are clean. Sometimes brushing in a circular motion over each tooth is helpful. If you have an electric toothbrush, follow the manufacturer’s instructions for cleaning your braces. Don’t forget to brush your molars and your tongue, too!
- Floss at least once a day. The floss must go underneath the arch wire of each tooth. You need to poke the floss underneath the arch wire, floss the tooth, then remove the floss, and repeat the process on the next tooth. This can get tricky, especially for the back molars. Fortunately, there are several products which can help you. You can use any floss you like with a Floss Threader Needle or the FlossFish tool. Several brands of floss have a built-in stiff end, such as Oral-b Crest Glide Threader Floss. INo matter what type of floss you use, just go slowly and be patient with yourself. Flossing braces is one of the most frustrating parts of the entire process, especially at first. As time passes you’ll get better and faster at flossing.
- Consider an Oral Irrigator, especially if you can’t floss well. Oral irrigators don’t take the place of flossing, but you can add irrigation to your routine to ensure that your teeth and gums stay super healthy. We sell a great oral irrigator made by Oral Breeze which hooks up to your bathroom faucet.
When you have braces, consider getting your teeth professionally cleaned by your dentist more often. When I had my braces, I got four cleanings per year instead of the usual two cleanings. Cleaning your teeth more often will ensure that you don’t get any “bad surprises” whe